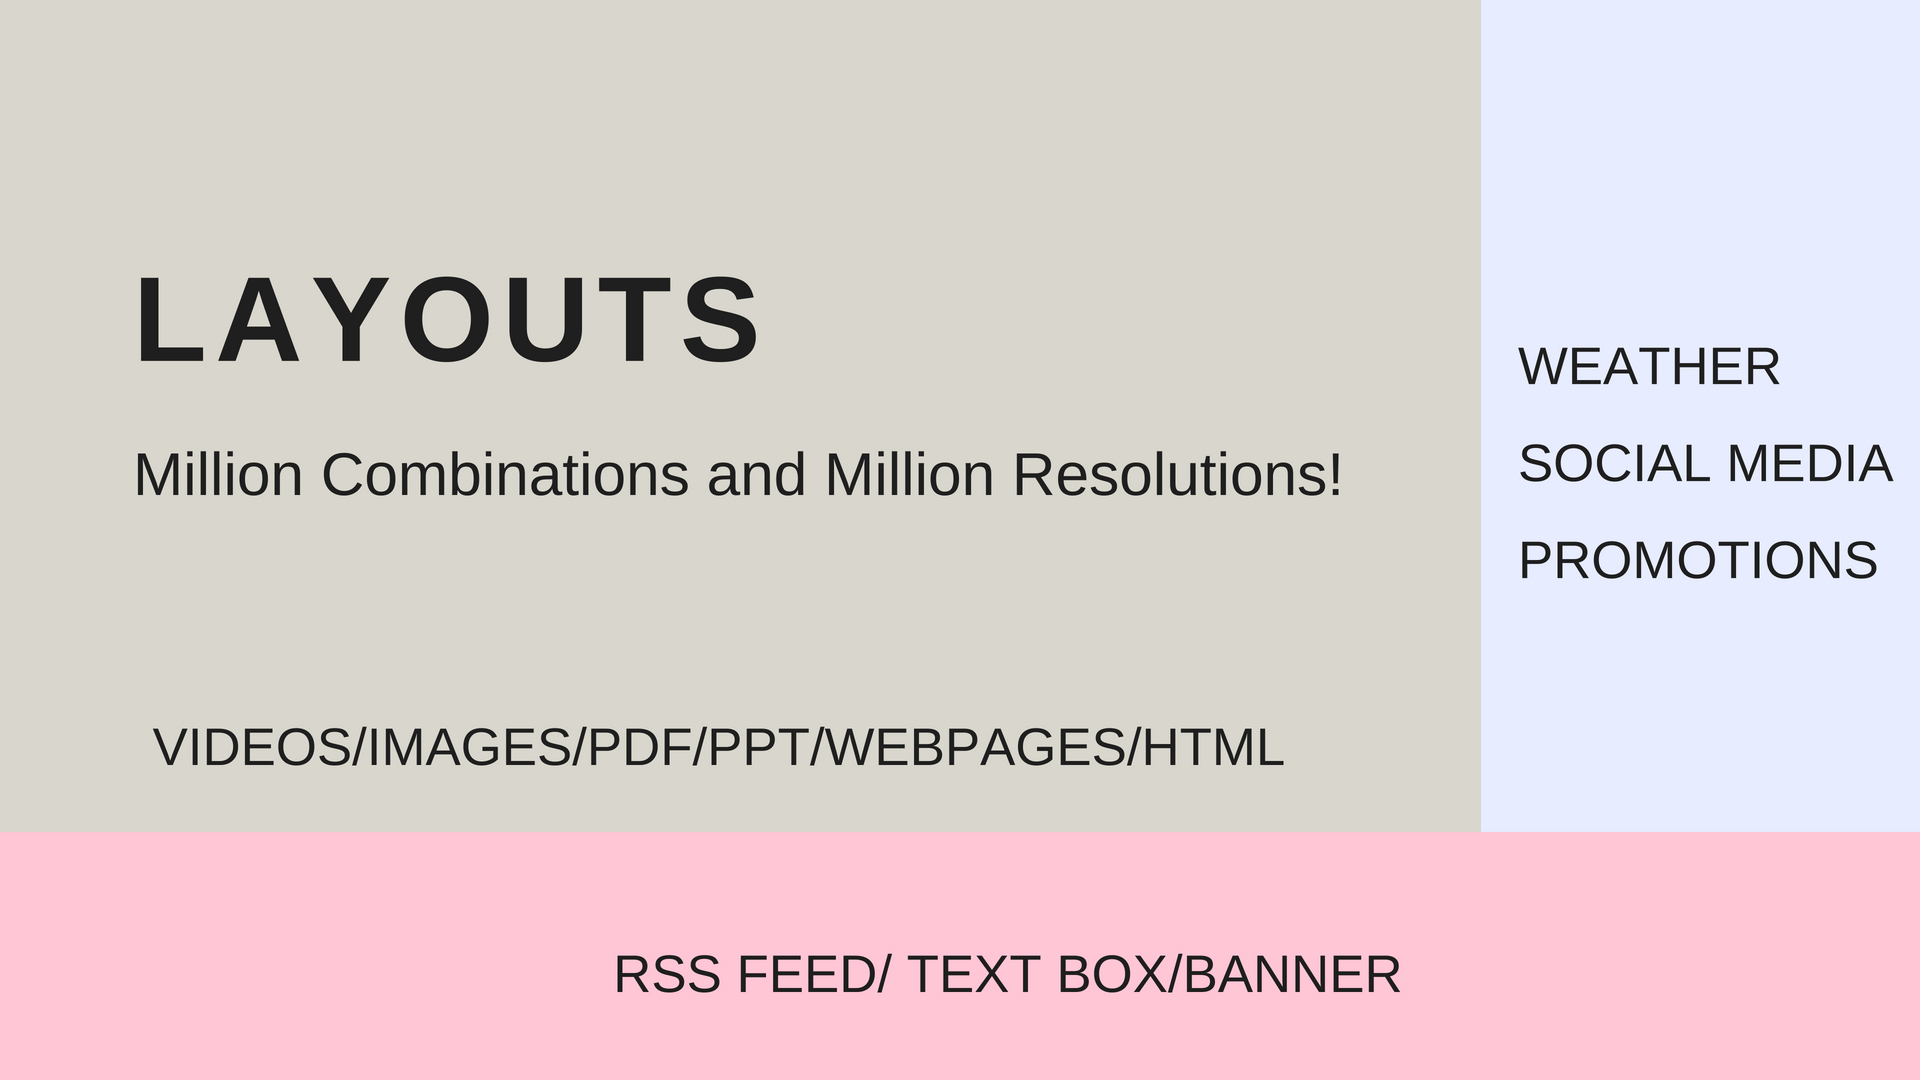
“A million ways to divide the screen for a million display resolutions!” This summarises a full-fledged Layouts feature for Digital Signage in a single line.

Layouts enable the user to divide the screen into multiple parts with each part having a separate series of media files. This is promising for several business cases. One part of the layout could run informative videos, the second part can run Promotions or showcase weather and the third part can have RSS feeds. Any set of combinations of layouts can be designed according to the use case.
Business Case: One Digital Out Of Home Agency installed their displays in high population density indoor avenues like salons, restaurants, hospitals and grocery stores. DOOH guys enticed the location owners by providing free hardware along with 40% screen space to showcase their location images. The other 40% is reserved for Video Ads and the final 20% is used to show the DOOH brand image with contact details. DOOH Agnecycapitaliz on high population density locations and charges brands to showcase their Ads on the display network. This business model was implemented by making the best use of Layouts feature.
How to use Layouts feature in Digital Signage CMS?
Step 1: Layout selection

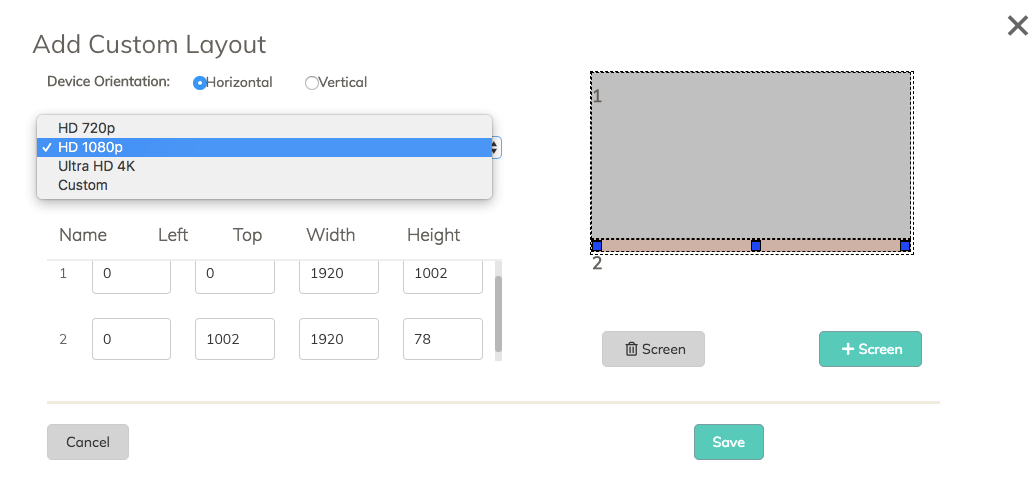
Select the resolution of the display along with the orientation. If it’s a custom resolution, enter the frame height and width. Left top is considered as (0,0). Provide the coordinates along with each frame’s dimensions. Add as many frames as you want in a single layout and proceed ahead.
Step2: Associating media to the Layout

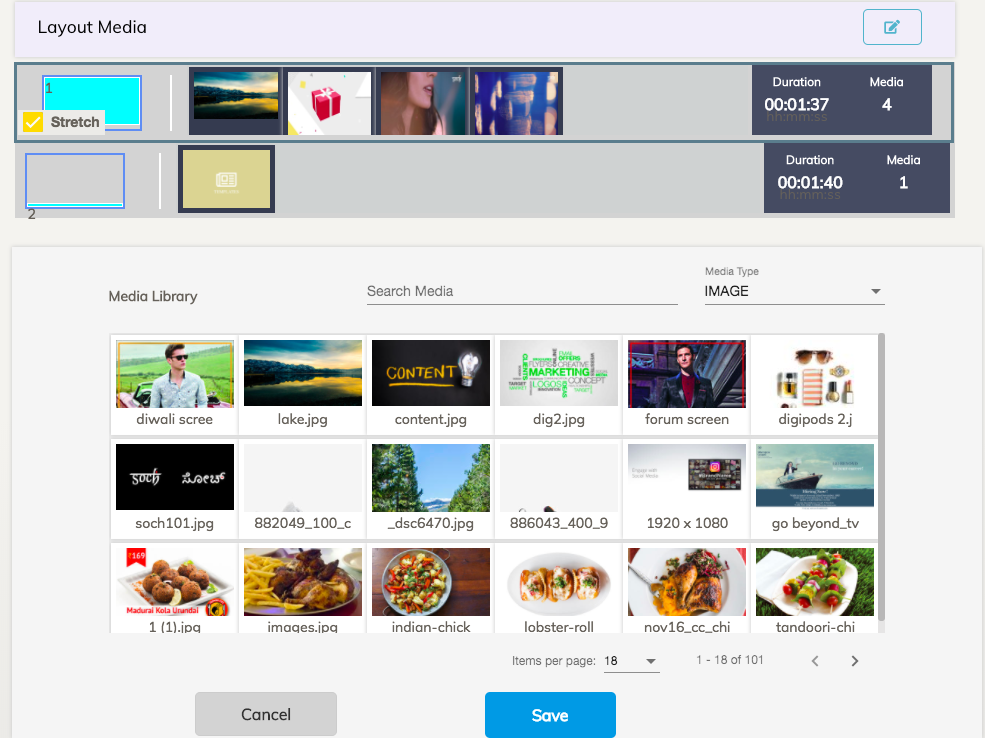
After selecting the layout, select each frame to include a series of media files to be played in a loop. Proceed to the next frame until all the frames are with media files. The user also has the flexibility to select “stretch” in order to ensure the media files fit the screen resolution perfectly with no black borders.
Finally, Save and associate this layout to a display in order to see the output on the screen.